How To
1. Sign Up/Sign In to Portal
You can sign up by accepting the Turkish Airlines API Portal and Service Agreement. If you have an existing account and have forgotten your account credentials, you can create a new password by clicking the 'Forgot Password' button. If you do not have an account, you must create a new account. In the initial phase, only one person per team is allowed to create an account.
If you already have an account, go to the Sign In page and jump to step 2. Go to our sign-up page. Complete the registration and create an account. While creating an account, OTP registration occurs after user registration, and OTP is required for each login. Users are allowed to change devices, but if they wish to reset OTP, they need to contact us officially. You now have access to your dashboard. From here you can create and configure your apps.


2. Explore APIs and Plans
You can explore the details of Shared APIs and Plans in the Documentation tab and choose the most suitable one for your application.
(Sandbox/Test Plan (3k/day) – Production API Plan (API quota and rate limits can be determined according to the agreement and usage.)
The apps you create appear on your homepage. If you do not have an application created yet, you must first create an application. It is normal for users to encounter a blank screen after registering, and they should contact us to obtain product authorization for creating applications. When creating an application, you must specify the name of your application and on which platform your application will run. After clicking the Save button, you will be able to see your application information in the Applications section on the Home Page.
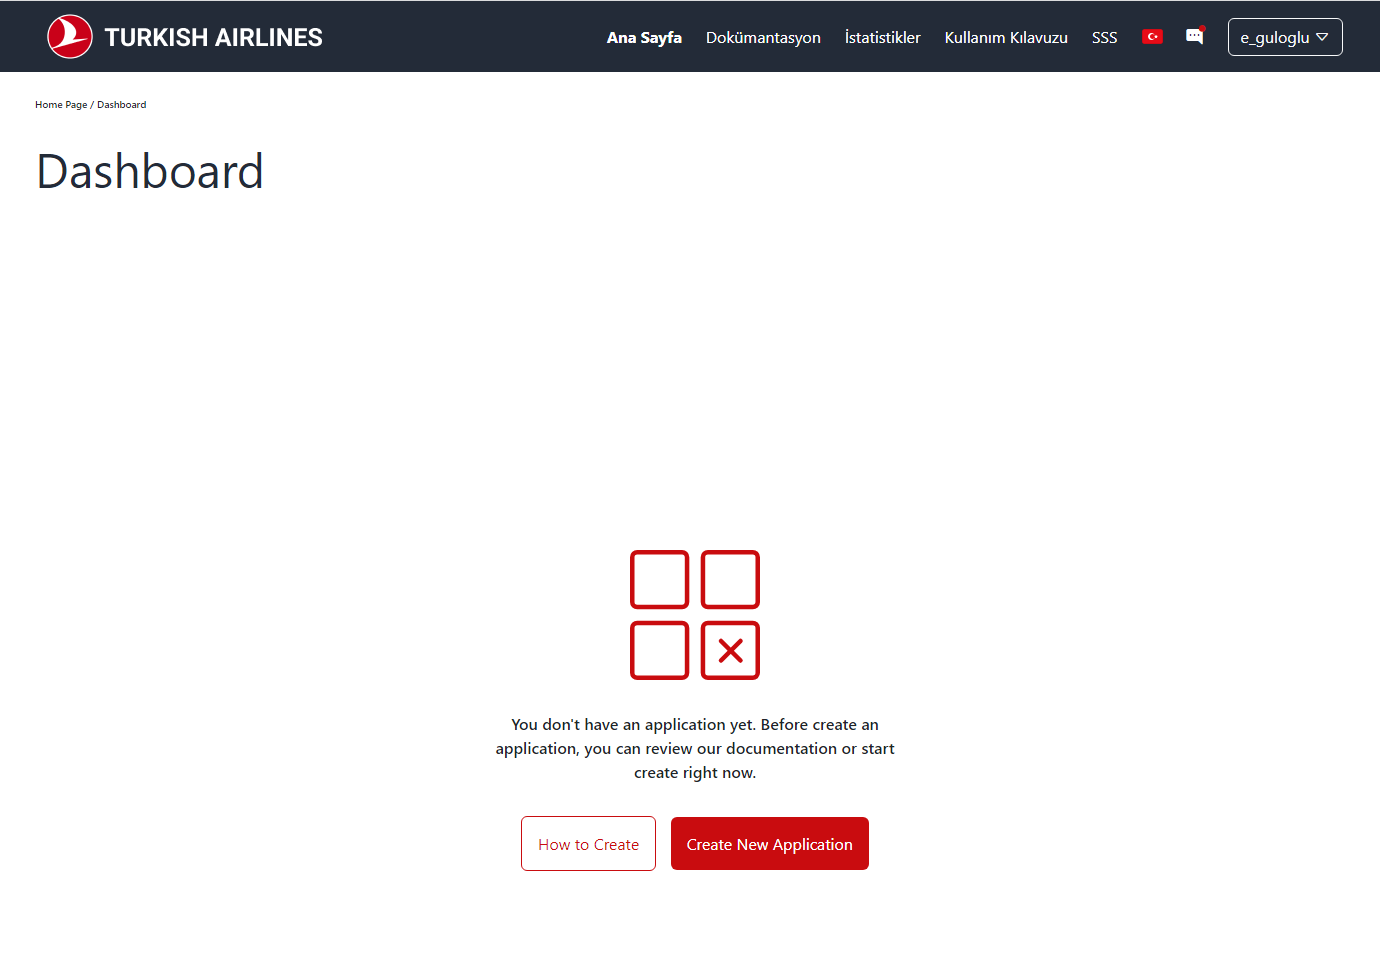
Click on 'Create New Application' in the Home Page. Next, decide the application plan and click on 'Continue'. When authorization is requested for a product, initially only access to the product's Test Plan is granted. Subsequently, authorization for the Production Plan is conferred after consultation between the product owner and the team. As Test Plan and Production Plan are separate entities, their access permissions differ. Therefore, separate applications need to be created.
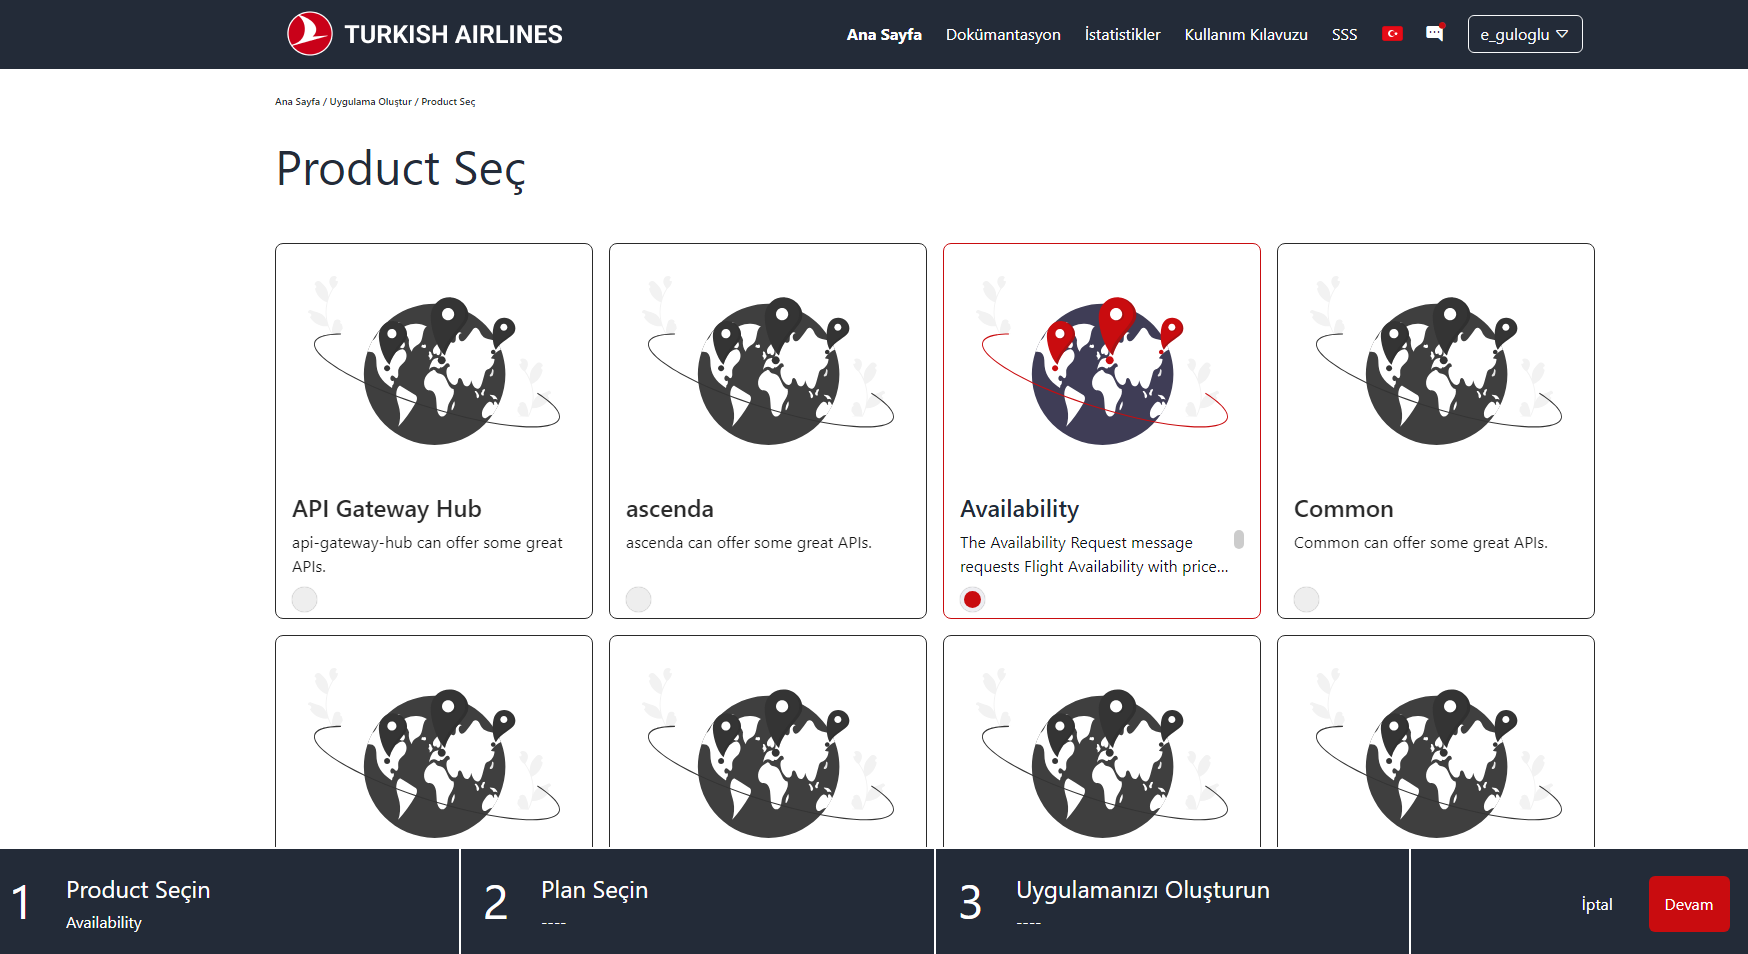
Decide the application plan and click on 'Continue'.
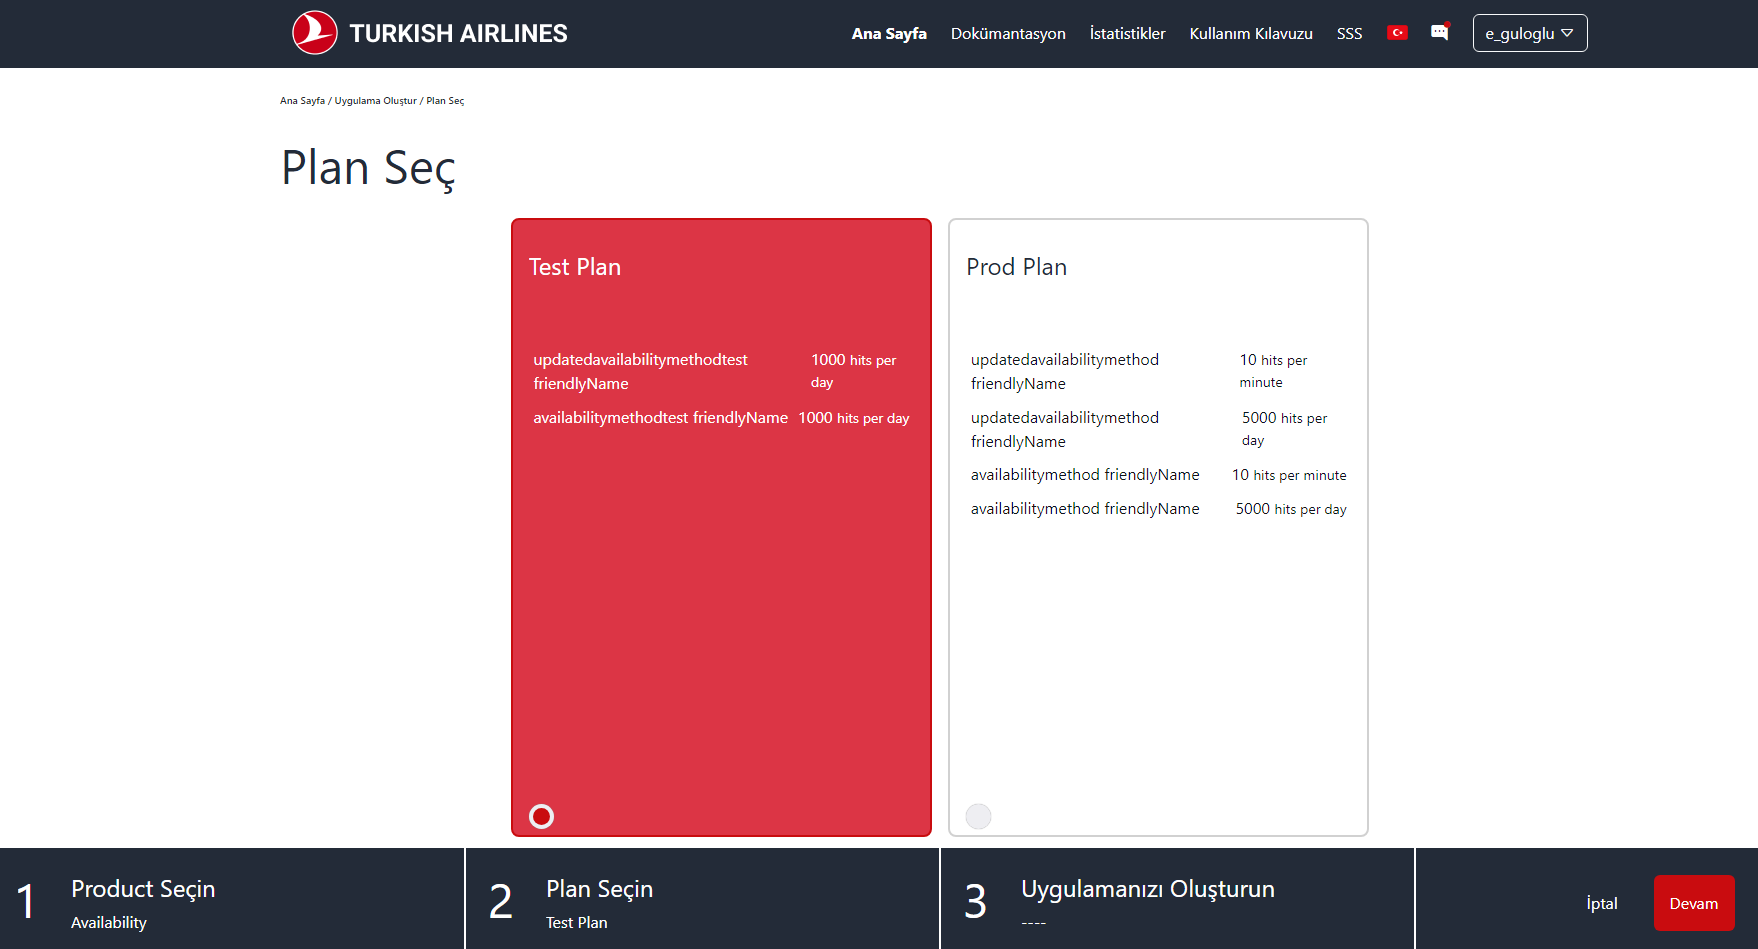
Decide the application plan and click on 'Continue'.
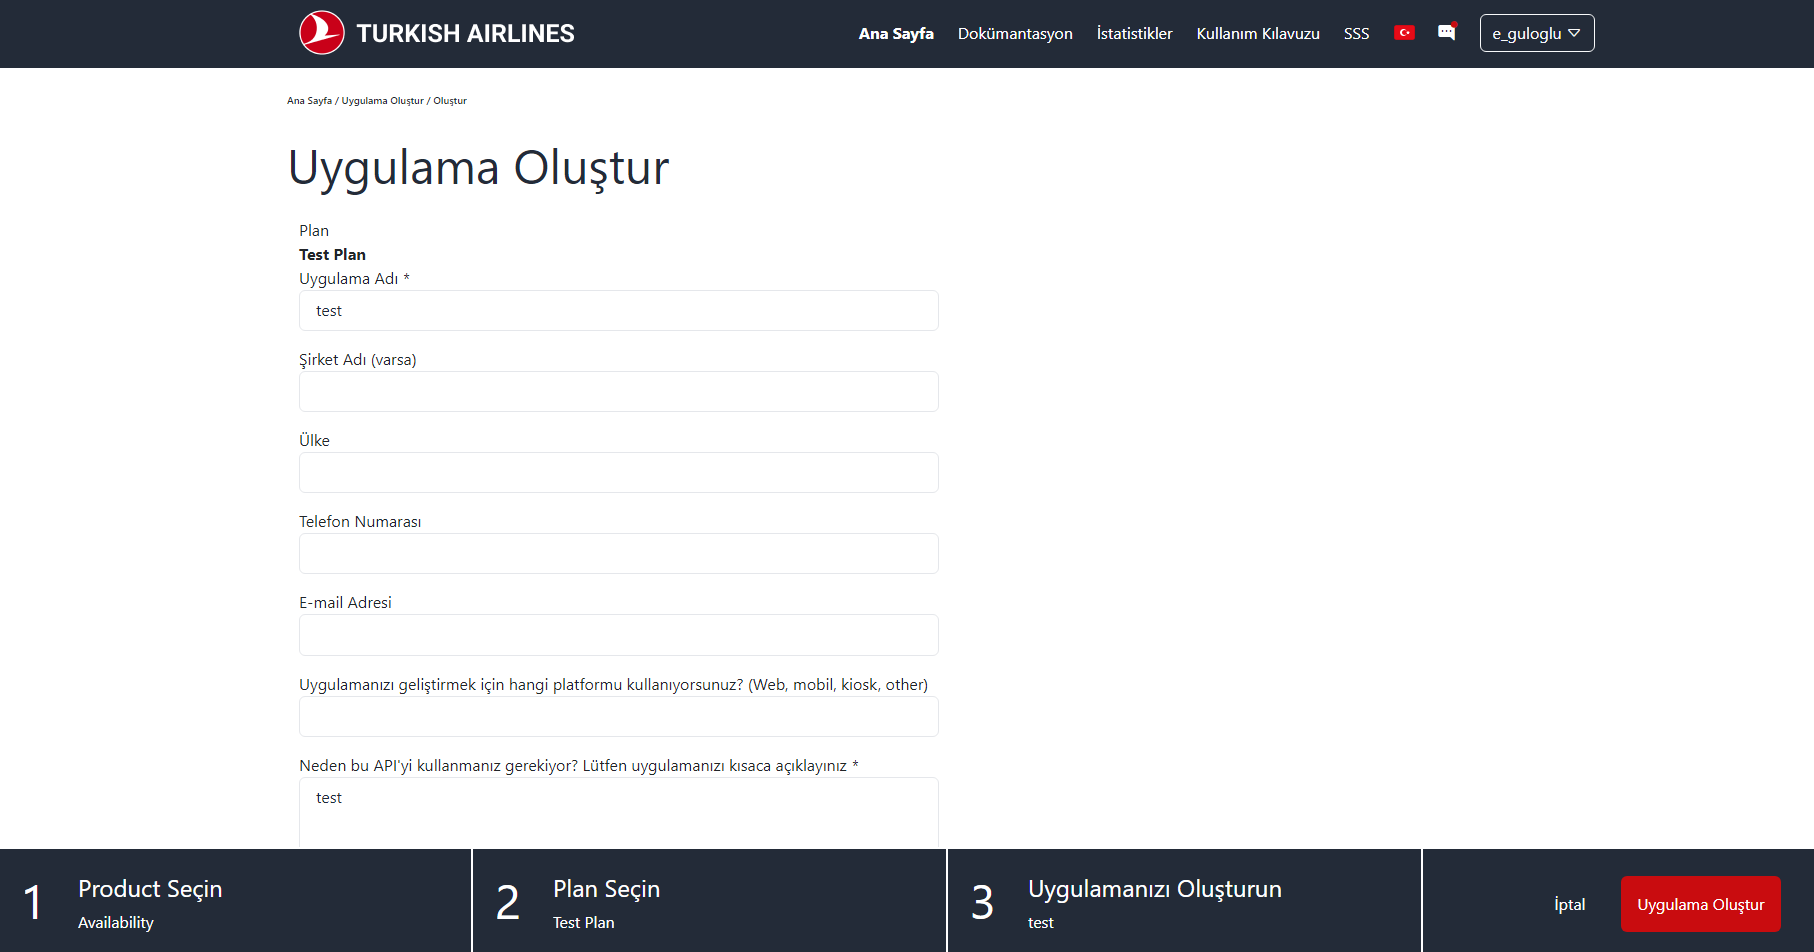
Write the requested information in each box and click on 'Continue'.
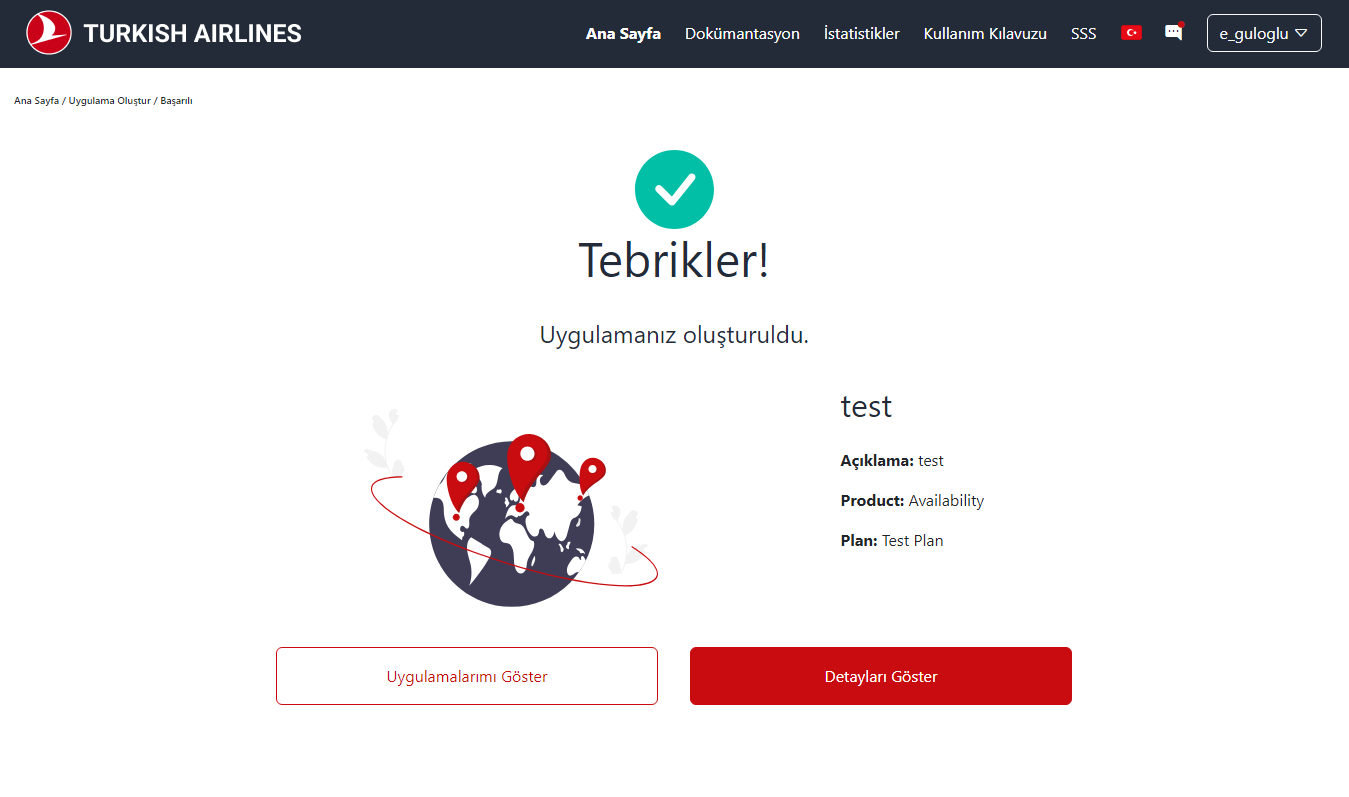
Finally, click onto the 'View Details' to get the client ID and client secret information.
3. Start Using the APIs
Now that you have successfully completed all the steps, you can start using the APIs.
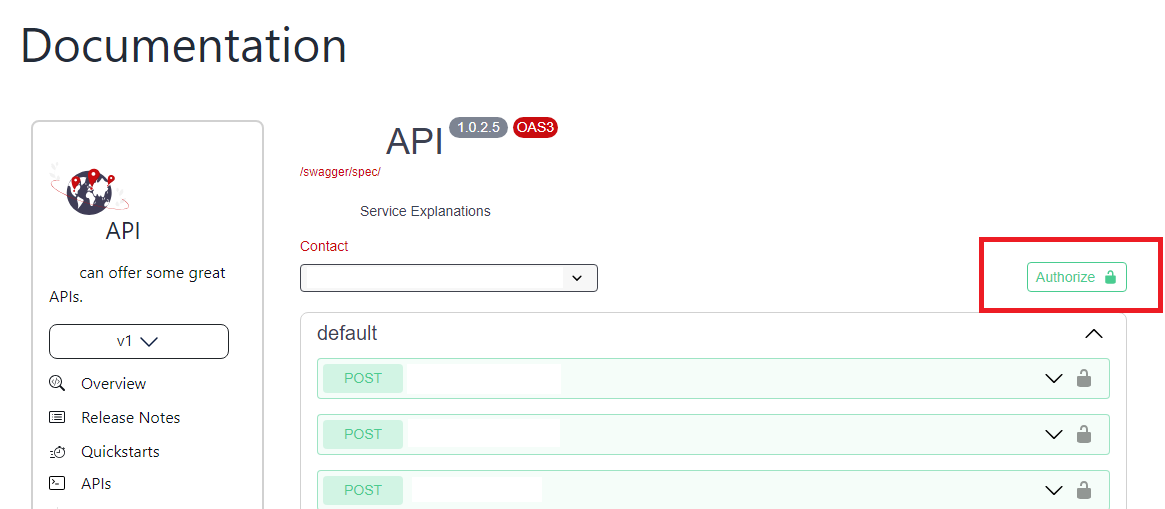
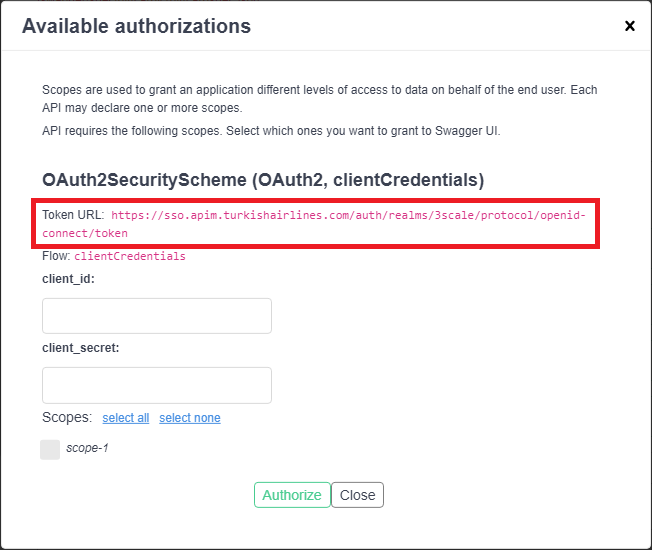
You can test your APIs with API testing tools. 'oAuth2' should be selected as the Authorization Type, 'Client Credentials' as the Grant Type, and 'Send client credentials in body' as the Client Authentication. API access URL information, Token URL information (under Authorize) and API sample request from the Documentation page; You can obtain your Client ID and Client Secret from the application details on the portal. The token is refreshed every 5 minutes. You should adjust your API access settings accordingly. You need to send the Transaction ID information from the header. We expect separate values to be sent for 'transactionId' in the key field and for each API call in the value field. If there is an input parameter related to the date in the sample request, the date must be up to date. You can also test your APIs with the 'Try it Out' feature on the Documentation page. It should be noted that "Try it out" is solely for testing purposes, and APIs should be invoked using tools like Postman rather than from this interface.Authorize is used to activate the "Try it Out" section. API calls are not made from the Authorize section. To create API calls, an application needs to be created from the Home Page and then invoked from Postman with the client ID, client secret, and other authorization details.
You can review the usage data of the APIs you have created from the Analytics tab.


POST is selected as the method and the dev environment URL is entered. In the “Authorization” tab, on the left side of the screen, the “Type” box is selected as “OAuth 2.0” and the “Add authorization data to” box is selected as “Request Headers”. In the Authorization tab, on the right side of the screen, the "Access Token" box should be selected as "Available Tokens". The "Header Prefix" field should be entered as "Bearer".

After scrolling down, the "Token Name" can be determined by the developer, the "Grant Type" box should be selected as "Client Credentials". In the "Access Token URL" field, the SSO url of the environment where the application was created should be entered. For the example here, the converted-amount product for the dev environment should be entered. The application was created.As the Request URL was entered as the dev environment, the Access Token URL was entered as the dev environment URL of the SSO. Client ID and Client Secret information should be obtained from the page in the Developer Portal where the details of the application are located.

The "Scope" field can also be determined by the developer. After selecting the "Client Authentication" box as "Send client credentials in body", the "Get New Access Token" button should be clicked. After clicking the "Get New Access Token" button, the "Proceed" and "Use Token" buttons should be clicked, respectively, from the screens that appear.

Finally, go to the "Headers" tab and add a key called "transactionId" in camel case format. The value to be set as "Value" can be determined by the developer, but this value should be unique for each request. After these stages are finished, you can send your request by saying "Send".
